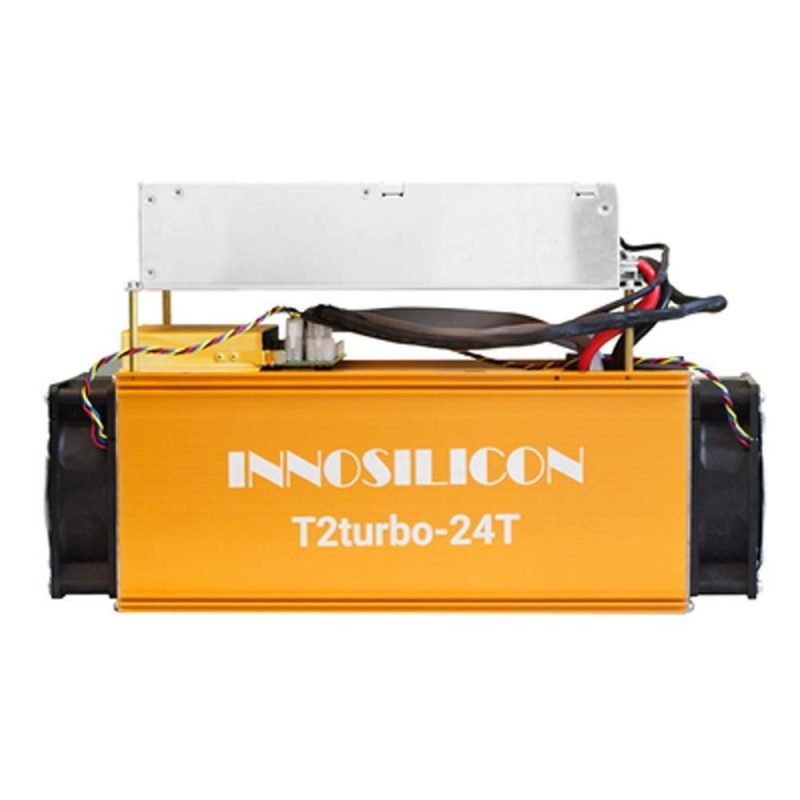
24THS Innosilicon T2 Turbo (T2T) Bitcoin ASIC Miner


Innosilicon has released a new 24 THS Bitcoin ASIC miner based on 10nm chips utilizing Samsung Foundry’s advanced low-power FinFET technology. The new T2 Turbo miner should be capable of deliverin 24 THS hasrate with 1980 Watts of power usage, very similar to what the recently announced Japanese 7nm GMO Miner B2 promises. The Innosilicon T2 Turbo is already available for order priced at $1350 USD (roughly 0.19 BTC or 19 LTC at the moment) and it comes with a built-in power supply included in the price. Delivery of the first batch starts from 15th August to 25th August on a first come first serve basis.

Innosilicon T2 Turbo Specifications:
– Hashrate: 24TH/s (+/-5%)
– Power Consumption: 1980W (+10%, normal mode, at the wall, with 93% efficiency PSU, 25°C temperature)
– Chip Type: INNOSILICON T2 Turbo Miner
– Dimensions: 408mm(L)*135mm(W)*232mm(H)
– Net Weight: 8.82KG
– Ambient Temperature: 0°C—85°C (device junction temperature)
– Network Connection: Ethernet

For more details about the 24 THS Innosilicon T2 Turbo (T2T) Bitcoin ASIC miner…

myHash Simple Nvidia Crypto Mining Profitability Calculator

myHash is yet another interesting, useful and very simple mining calculator that gives you access to an easy way to see what is most profitable to mine at the moment for a single Nidia GPU (AMD not currently supported). You get brief information about the supported coins including hashrate and miner used, pool and exchange where it is being traded and of course the 24 hour profitability. Could be another handy tool to quickly check out for new interesting coins with nice profitability, so you could add the myHash mining calculator in your arsenal of crypto tools. There are of course some things that can be further improved regarding the profitability data, so it is not only for the last day, but for different time frames as often things change much more rapidly in the world of crypto.

To check out the myHash Nvidia Crypto Mining Profitability Calculator…

ASUS H370 Mining Master Review

Remember me saying that mining rigs with more than 6 GPUS are a mess to configure? Well, the new Asus H370 is here to prove me wrong.

Being the first motherboard to support up to 20 GPUs, the H370 is also hands down the most miner-friendly mobo available on the market.

Unlike most other mining-oriented boards, the H370 comes pre-configured to be used in a mining rig; it features inbuilt risers and comes with diagnostic utilities. Let’s take a closer look at this upcoming motherboard.

Asus H370 Mining Master Specs

Socket: Intel Socket 1151 for 8th Generation Core i7/Core i5/Core i3/Pentium/Celeron Processors 14nm Coffee Lake CPU
Memory Slots: 2 x DIMM, Max. 32GB, DDR4 2666/2400/2133 MHz Non-ECC, unbuffered memory
Multi-VGA output support : HDMI/DVI-D ports
Expansion Slots: 1 x PCIe x16*
GPU riser ports: 20 x PCIe over USB (vertical)
Storage: 2 x SATA 6Gb/s port(s)
USB Ports: 6 x USB 3.1 Gen 1 up to 5Gbps port(s) (4 at back panel, blue, Type-A, 2 at mid-board) 4 x USB 2.0 port(s) (2 at back panel, black, Type-A, 2 at mid-board)
ASUS 5x protection
ATX Form Factor 12 inch x 9.1 inch ( 30.5 cm x 23.1 cm )

(*) While there is an additional PCIe slot, it sits on the same lane as the A01 riser port, which is why it is not possible to install 21 GPUs on this board.


The innovation in the design of this board is that it has inbuilt PCI-e x1 to USB converters. This means that we no longer need the PCIe x1 link of the riser to plug in our GPUs into the board. We simply discard that riser part and plug in the USB part of the cable straight into the board. Less mobile parts translates into less possible problems, which is why I believe this design feature is quite a nice addition.

What else do we have on the menu?

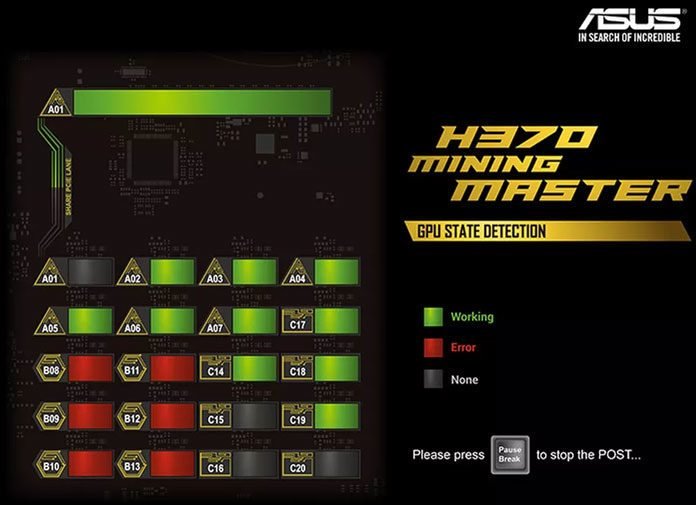
ASUS GPU State Detection

On boot, the system scans the risers and shows which ones have a GPU connected, which ones are empty and which ones are having an error. Furthemore, every slot is labeled to be able to find easier a troubled GPU. Individual debug LEDs further help to identify any GPU or memory issues. The B250 Mining Expert has a similar diagnostic tool, which is critical for a board that has to manage so many GPUs at the same time.


Instead of tweaking the UEFI of our freshly-bought motherboard, we can now simply plug the GPUs in and start mining. The H370 comes pre-configured to work in a mining rig and requires no tweaking. Of course, we can always switch it back to normal mode in the config menu in case we’d want to use it for gaming.

Three 24-PIN Power Supply Connectors

This feature speaks for itself. We can connect up to three PSUs simultaneously to the board. Each connector is linked to a certain amount of riser ports. This means that if we decide to use less than 20 GPUs, we can use less PSUs too without the need to change anything in the options. We do have however to make sure to plug the cards to the same PSUs that go to the risers.
ASUS H370 Mining Master 20 GPU Mining Rig 2ASUS H370 Mining Master 20 GPU Mining Rig 2
ASUS H370 Mining Master Presentation 2ASUS H370 Mining Master Presentation 2

Availability

First announced in May of this year, the board was first shown to the public in the Computex 2018 in Taipei, Taiwan that took place between June 5 and 9. Bloggers from all over the world have seen the board in action with their own eyes. For example, a Spanish blogger writes that the performance of the board equipped with 20 GPUs was impressive and watching the rig work was a show on its own.


Asus promises to release the board by the end of the year. I am definitely looking forward testing this new board out as soon as I can. Hopefully, I will get one from Asus to test and review before it gets on the market. I will keep you guys up to date.

In Conclusion

Most mining-oriented boards out there are okay, though apparently none of them can be compared to the H370. If all goes well, soon we will be able to purchase a board that is relatively easy to set up and manage. If you have already dealt with 12+ GPU mining rigs, you know how much of a hassle it can be to make it work as intended. If the H370 stands to the hype, I might get back to assembling huge mining rigs as I used to do back in the day.

Gigabyte GA-B250-FinTech 12x PCI-E Mining Motherboard


It seems that Gigabyte is getting more serious in trying to get more of the mining market share for motherboards after they have left AsRock to dominate the mining motherboard market for a long time. They even lost positions to their main competitor – Asus and many other smaller manufacturers that entered the mining market. Gigabyte has been trying to get back on track with the last year’s release of the affordable Gigabyte GA-H110-D3A 6x PCI-E GPU Mining Motherboard and now it seems the company is also targeting the market for more than 6/8/9 GPUs on a single motherboard as well with their new Gigabyte GA-B250-FinTech motherboard for up to 12 video cards.

The new mining motherboard is based on the Intel B250 Express Chipset and is meant for use with Intel LGA1151 processors and DDR4 system memory. It comes with DSUB and DVI video outputs for the built in Intel graphics inside the CPU and there are two extra onboard 4-pin Molex power connectors for use if you don’t rely on powered PCI-E risers (not a very wise idea for 12 video cards), so you may skip them and just stick with powered risers. The rest is pretty standard configuration, though we should note that the motherboard does not seem to have an M.2 slot, so no option for extra 13th GPU or the ability to use an M.2 SSD drive and cut on extra cables.

The key selling point for Gigabyte with their GA-B250-FinTech 12x PCI-E mining motherboard is the cost savings you get when you use 12 video cards on a single board compared to two rigs with 6 cards each. While this is true, it is also worthwhile noting that 12 GPU mining rigs are larger and harder to maintain and support in case of trouble such as failed cheap Gigabyte Windforce fans for example.

Gigabyte is providing the so called Mining Kit with the GA-B250-FinTech motherboard that consists of a Front Panel Switch Card that comes with Power and Reset buttons. While this seems usable and convenient, it is actually not that functional as the board plugs into the Front Panel connector on the motherboard, so it will most likely still end under a GPU or near a PSU and it will not be very convenient for use. Getting a power button or even a power and reset button would be useful if they are with a decent length cable and you get the ability to position the button(s) in a convenient position on your rig. There are number of different mining rig designs, so adding useful flexibility with a power and/or reset buttons might be really useful, but not that much in the case of the Gigabyte Front Panel Switch Card. Sometimes one would think that these companies just don’t know what they are doing with their products, but then again they can always ask for help and support some miners to give them advice on what and how to do.

The other piece of hardware, if we can call it like that, that you get with the mining motherboard as a part of the Mining Kit is the 3-in-1 PSU Power-On Adapter. It is essentially a cable that allows you to power on one or two extra PSUs as soon as the main power supply turns on and this one is actually useful to have, especially if you build 12x GPU mining rig as you will most likely need more connectors than a single or even two power supplies can provide (depending on the GPUs you are using of course). So good job on this one Gigabyte, but you still might want to rethink the idea you have for the front panel switch card or actually make it more useful and functional for a wider number of users.

The last probably useful feature in the new Gigabyte GA-B250-FinTech motherboard for miners is the Mining Mode in the BIOS. A setting that should in theory make it easier for miners to setup the motherboard for use in mining rigs without having trouble when using more video cards, up to 12, though you can still use this motherboard with a smaller number of GPUs as well. The Mining Mode in BIOS has been available for a while on some Gigabyte motherboards that were not designed especially as mining motherboards, but have been proven to work well as such, so it is nothing that new anyway. People that have used Gigabyte motherboards for building mining rigs are probably already familiar with using that mode in the BIOS.

For more details about the Gigabyte GA-B250-FinTech 12x PCI-E Mining Motherboard…

Best cards to mine ethereum 2018

1. Nvidia GeForce GTX 1070

Low power draw, high hash rate

Core Clock: 1,506MHz | Memory: 8GB GDDR5 | Memory Clock: 8Gbps | Power Connectors: 1 x 6-pin | Power Draw: 150W | Outputs: 3 x DisplayPort 1.4, 1 x HDMI 2.0, DL-DVI


+Good balance of power and hash rate
+High amount of memory
Expensive

Nvidia’s GTX 1070 isn’t just a great graphics card for gaming, it’s also an excellent mining GPU. This is because it manages a high hash rate of around 30 mh/s without needed too much power. Remember, the more power a GPU requires, the more expensive it is to run, which will eat into your cryptocurrency profits. As with many recent Nvidia GPUs, the 1070 is on the pricey side, so you will have to take an initial hit when starting up, but if you’re into cryptocurrency mining for the long run, the 1070 is easily the best mining GPU currently available.


2. AMD Radeon RX 580

AMD’s GPU is a mining winner

Core Clock: 1,257MHz | Memory: 8GB GDDR5 | Memory Clock: 8Gbps | Power Connectors: 1x 8-pin, 1 x 6-pin | Power Draw: 185W | Outputs: 1 DisplayPort 1.4, 1 x HDMI 2.0


+Very good cooling
Often sold out due to its popularity for mining

The AMD Radeon RX 580 is one of the very best GPUs for mining, and in fact is a bit of a victim of its own success, as it can sometimes be difficult to find. However, its popularity is warranted, as it offers an excellent hash rate of 29 mh/s, while also keeping the electricity consumption low as well. It’s also cheaper than the GTX 1070, and if you don’t mind tweaking a few settings, you’ll be very pleased with this card’s mining performance.


3. AMD RX 480

An older GPU, but still great at mining


Core Clock: 1,120MHz | Memory: 8GB GDDR5 | Memory Clock: 8Gbps | Power Connectors: 1x 8-pin, 1 x 6-pin | Power Draw: 150W | Outputs: 1 DisplayPort 1.4, 1 x HDMI 2.0

+Cheap
+Good mining performance
Can be hard to find

If you want a low cost of entry into the world of mining, then the AMD RX 480 is an excellent choice. This is because it is a bit older than the AMD Radeon RX 580, so prices are lower – when you can find one in stock. Yep, this is another AMD card that can be difficult to track down thanks to its mining ability. However with 8GB of GDDR5 RAM, it achieves a decent hash rate of 28mh/s, and again doesn’t require too much power. There are also versions available with 4GB of GDDR5 RAM, if you’re looking for an even lower cost mining GPU.


4. AMD Radeon RX Vega 56

Punchy graphics performance above its weight

Core Clock: 1,156MHz | Memory: 8GB HBM2 | Memory Clock: 800MHz | Power Connectors: 2 x 8-pin | Power Draw: 210W | Outputs: 3 x DisplayPort 1.4, 1 x HDMI 2.0


+Very good mining performance
High energy consumption
Runs a tad hot

The AMD Radeon RX Vega 56 is one of the best value-packed graphics card on the market right now. Benchmarks prove it runs faster than the Nvidia GTX 1070 and, thanks to the Bitcoin mining craze, it’s also cheaper to boot. Again, it can be a tricky GPU to track down, and it’s power consumption means it can end up being a pricey GPU to run 24/7 in a mining rig, but it performs very well at mining, so if you can find one, it’s definitely worth considering.


5. Nvidia GTX 1080 Ti

A brilliant, yet expensive, GPU for mining

Core Clock: 1,480MHz | Memory: 11GB GDDR5X | Memory Clock: 11GHz | Power Connectors: 1 x 6-pin; 1 x 8-pin | Power Draw: 250W | Outputs: 3 x DisplayPort 1.4, 1 x HDMI 2.0


+Incredibly powerful
+Excellent hash rates
Expensive to buy and to run

The Nvidia GTX 1080 Ti remains one of the most powerful graphics cards in the world, and is our recommendation as the best graphics card for 4K gaming. However, as a mining GPU, it is also an excellent choice, but there are a few considerations that prevent it being higher up this list. First of all, it’s still an expensive GPU, and the power consumption is high compared to other cards. This means the return on your investment is less, and will take longer to cover your costs. If you don’t mind splashing out on this GPU (or you’re going to also use it to play games with), then you’ll be very happy with the results, especially as with a bit of tweaking you can get a hash rate of 32 mh/s.

How to buy Verge(XVG)

Verge Currency is a cryptocurrency designed for everyday use. It improves upon the original Bitcoin blockchain and aims to fulfill its initial purpose of providing individuals and businesses with a fast, efficient and decentralized way of making direct transactions while maintaining personal privacy.

1.First we’ll purchase the popular cryptocurrency Ethereum on coinbase, so that we can exchange it for Verge (if you already own Ethereum you can skip ahead).

2.Use this link to sign up to Coinbase we’ll both receive ten dollars of free coins when you spend over $100 (or the equivalent in your currency).

3.Press the ‘sign up’ button and fill out your name (make sure this is exactly how it’s written on your photo ID), email, password and location.

Just like a US bank, Coinbase is regulated by the US government, and has to follow strict financial rules. So they take verifying your identity very seriously. It’s a pain, but it does give Coinbase a reputation for being the most trusted way to convert fiat currency to cryptocurrency.

To verify your account you must supply a phone number, upload an image of your photo ID and verify a credit/debit card or bank account before you can buy.

4.Using a credit/debit card on Coinbase means higher fees but offers instant purchasing. Using a bank transfer is cheaper but slower (taking up to a week to get your coins).

Once your payment details are verified, click ‘buy/sell’ on the top menu.

Select ‘Ethereum’, and at the bottom of the page choose how much to spend in your local currency / how many coins you want to buy.

Once you’re happy with the amount, click the big ‘Buy’ button.

You’ll be asked to confirm your purchase.

Press the ‘Confirm Buy’ button.

Congratulations! You now own some Ethereum. But don’t close Coinbase yet, we’re going to need it again in a few minutes.

5.We’ll use the site Binance to exchange your Ethereum for Tron.

Click here to go to Binance, and click ‘Register’ on the top right menu.

Enter your email and a strong password (that you won’t forget!).

Click ‘Register’.

6.You will be sent an email to confirm your email address.

Click the link in the email.

You will be taken back to Binance as your email is confirmed.

Press ‘Login’.

On the login form, enter the email and password you just used to sign up, then press ‘Login’.

A pop-up will advise you to set up 2FA (two factor authentication) on your account.

We strongly advise you to do this- in the event a hacker manages to get hold of your password, this second level of security makes it very unlikely they will be able to get into your Binance account.

We recommend using the Authy app on your mobile phone or web browser.

7.Hover your mouse over ‘FUNDS’ on the top menu and click on ‘Deposits Withdrawals’.

This screen displays any coins you have stored on Binance- obviously none at the moment.

Type ‘Ethereum’ in the search box.

This will narrow the wallets displayed to just a few- in those, find Ethereum.

Press ‘Deposit’

You will be given a Ethereum deposit address (a long string of numbers and letters).

Copy this address and keep it somewhere safe as we’re going to need it soon.

Now we’ve got to wait a few minutes for the coins to move across the network.

Unless there’s an unusually large network backlog, the coins will take between 20 and 60 minutes to appear in your Binance wallet.

Binance will update automatically so there’s no need to refresh the page.

Once the Ethereum shows in your ‘available balance’ we’re ready to trade for Tron.

8.Click here to jump straight to the XVG/ETH exchange market on Binance.

The exchange page can look overwhelming at first, but don’t worry, we’re only going to use a small part of it.

There are two ways of buying coins:

A ‘Limit’ order, which lets you manually set the price at which you want to buy XVG.

A ‘Market’ buy, which fills your order automatically at the best price available.

As market buy is the simpler of the two options we’ll go with that.

Look for the big green ‘Buy XVG’ button.

Above it, click the ‘Market’ option.

In the input box marked ‘Amount’ you now need to fill in how many XVG you’d like to buy. It may be easier to use the percentage buttons below the input box- for example, press 50% if you’d like to exchange 50% of your Ethereum for XVG.

When you’re happy with the amount, press the buy button.

Your order will be filled immediately.

Press ‘Funds’ along the top menu, then ‘Deposits Withdrawals’.

In the search box, type XVG. You will now see your new XVG in your XVG wallet.

If you’re comfortable with it, you could just leave your coins on Binance and they would probably be safe.


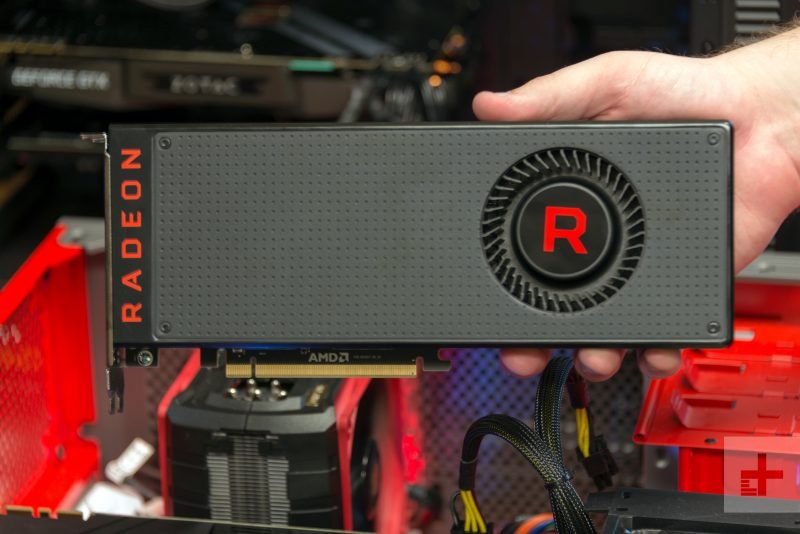
AMD RX VEGA 56

The biggest quest for Ethereum miners is undoubtedly the search for a great GPU for their mining rig. There are a lot of options to choose from, and the sad fact that the GPU that comes in most computers by default just won’t do.
MINING SPECS

ETH Hashpower:

Power: 306 Watt
Hash Rate: 32.4 MH/s

ETH Hashpower (Vega 64 Flash Mod)

Power: 130 Watt
Hash Rate: 43.50 MH/s

*Claymore tested, by us, with more than 3 cards

Power: 160 Watt
Hash Rate: 38 MH/s

The Vega 56 looks to be quite promising for gamers, and benchmark tests implied that it would be a viable alternative to the Nvidia GeForce GTX 1070. The card is also being looked upon with hope from Ethereum miners, and AMD has released new drivers intended specifically for mining. These drivers will amp up the performance of Vega10 GPUs. The Vega 56 shows a consistent 36.48 MH/s when the memory was clocked to 1900MHz.

Pros and Cons

38.48 MH/s isn’t very high, but it is still the best for 130W of consumption. The memory clock speed is promising, especially when overclocked. However, this GPU isn’t perfect and using a fan or air conditioner will help to keep it cool. Remember that the fan isn’t a one stop solution to the health of your GPU. Regardless the cooling system it uses, operating in a cooled room will be healthier for your GPU than in a hot one.
Final Thoughts on The AMD RX VEGA 56

It may be hard to get your hands on the RX Vega 56, but if you do, would you really want it? There are better cards to get your hands on for around the same price tag, and it seems that AMD has been striking out a little bit with their cards and the use for mining. However, it is nice to see that AMD is looking out for miners with mining specific drivers. As an entry level mining GPU, the RX Vega 56 could work decently enough to get your feet wet in the mining industry.

How to buy Cardano(ada)

Cardano is a decentralised public blockchain and cryptocurrency project and is fully open source. Cardano is developing a smart contract platform which seeks to deliver more advanced features than any protocol previously developed. It is the first blockchain platform to evolve out of a scientific philosophy and a research-first driven approach. The development team consists of a large global collective of expert engineers and researchers

1.First we’ll purchase the popular cryptocurrency Ethereum on coinbase, so that we can exchange it for Cardano (if you already own Ethereum you can skip ahead).

2.Use this link to sign up to Coinbase we’ll both receive ten dollars of free coins when you spend over $100 (or the equivalent in your currency).

3.Press the ‘sign up’ button and fill out your name (make sure this is exactly how it’s written on your photo ID), email, password and location.

Just like a US bank, Coinbase is regulated by the US government, and has to follow strict financial rules. So they take verifying your identity very seriously. It’s a pain, but it does give Coinbase a reputation for being the most trusted way to convert fiat currency to cryptocurrency.

To verify your account you must supply a phone number, upload an image of your photo ID and verify a credit/debit card or bank account before you can buy.

4.Using a credit/debit card on Coinbase means higher fees but offers instant purchasing. Using a bank transfer is cheaper but slower (taking up to a week to get your coins).

Once your payment details are verified, click ‘buy/sell’ on the top menu.

Select ‘Ethereum’, and at the bottom of the page choose how much to spend in your local currency / how many coins you want to buy.

Once you’re happy with the amount, click the big ‘Buy’ button.

You’ll be asked to confirm your purchase.

Press the ‘Confirm Buy’ button.

Congratulations! You now own some Ethereum. But don’t close Coinbase yet, we’re going to need it again in a few minutes.

5.We’ll use the site Binance to exchange your Ethereum for Tron.

Click here to go to Binance, and click ‘Register’ on the top right menu.

Enter your email and a strong password (that you won’t forget!).

Click ‘Register’.

6.You will be sent an email to confirm your email address.

Click the link in the email.

You will be taken back to Binance as your email is confirmed.

Press ‘Login’.

On the login form, enter the email and password you just used to sign up, then press ‘Login’.

A pop-up will advise you to set up 2FA (two factor authentication) on your account.

We strongly advise you to do this- in the event a hacker manages to get hold of your password, this second level of security makes it very unlikely they will be able to get into your Binance account.

We recommend using the Authy app on your mobile phone or web browser.

7.Hover your mouse over ‘FUNDS’ on the top menu and click on ‘Deposits Withdrawals’.

This screen displays any coins you have stored on Binance- obviously none at the moment.

Type ‘Ethereum’ in the search box.

This will narrow the wallets displayed to just a few- in those, find Ethereum.

Press ‘Deposit’

You will be given a Ethereum deposit address (a long string of numbers and letters).

Copy this address and keep it somewhere safe as we’re going to need it soon.

Now we’ve got to wait a few minutes for the coins to move across the network.

Unless there’s an unusually large network backlog, the coins will take between 20 and 60 minutes to appear in your Binance wallet.

Binance will update automatically so there’s no need to refresh the page.

Once the Ethereum shows in your ‘available balance’ we’re ready to trade for Tron.

8.Click here to jump straight to the ADA/ETH exchange market on Binance.

The exchange page can look overwhelming at first, but don’t worry, we’re only going to use a small part of it.

There are two ways of buying coins:

A ‘Limit’ order, which lets you manually set the price at which you want to buy ADA.

A ‘Market’ buy, which fills your order automatically at the best price available.

As market buy is the simpler of the two options we’ll go with that.

Look for the big green ‘Buy ADA’ button.

Above it, click the ‘Market’ option.

In the input box marked ‘Amount’ you now need to fill in how many ADA you’d like to buy. It may be easier to use the percentage buttons below the input box- for example, press 50% if you’d like to exchange 50% of your Ethereum for ADA.

When you’re happy with the amount, press the buy button.

Your order will be filled immediately.

Press ‘Funds’ along the top menu, then ‘Deposits Withdrawals’.

In the search box, type ADA. You will now see your new ADA in your ADA wallet.

If you’re comfortable with it, you could just leave your coins on Binance and they would probably be safe.


Bminer, a Faster Equihash Alternative Miner for Nvidia GPUs

Bminer, a Faster Equihash Alternative Miner for Nvidia GPUs

Bminer is a relatively new miner for Nvidia GPUs for mining cryptocurrencies using the Equihash algorithm such as Zcash (ZEC). It is a closed source miner, available for both Windows and Linux operating systems and comes with a 2% dev fee included (optional, though disabling it apparently removes some optimizations). Bminer comes as an alternative to the popular EWBF miner, the development of which has been stalled for a while already, as well as the more recent dstm ZCash CUDA Miner that looks promising and is actively being developed, but still lacks some features such as failover pool support for example. So any new alternatives such as Bminer that are being actively improved and developed are more than welcome for the users and the crypto community as well.

According to its developers and most users that have tried the Bminer already it is the fastest publicly available Equihash miner for Nvidia GPUs and we can confirm that our initial impressions are showing a better local hashrate compared to the alternatives mentioned. So if you have a Compute Capability 5.0 or newer Nvidia GPU used for mining you might want to give Bminer a go and see if it will work better for you. The miner does come with SSL support as well as Nicehash support, has some interesting extra features, though it is still very easy to use. There is also an API and a web-based interface available for monitoring of your mining rigs that can be quite useful, so go and give it a try and report your results.

How to buy Bitcoin

Bitcoin has several important features that set it apart from government-backed currencies.

1. It’s decentralized

The bitcoin network isn’t controlled by one central authority. Every machine that mines bitcoin and processes transactions makes up a part of the network, and the machines work together. That means that, in theory, one central authority can’t tinker with monetary policy and cause a meltdown – or simply decide to take people’s bitcoins away from them, as the Central European Bank decided to do in Cyprus in early 2013. And if some part of the network goes offline for some reason, the money keeps on flowing.

2. It’s easy to set up

Conventional banks make you jump through hoops simply to open a bank account. Setting up merchant accounts for payment is another Kafkaesque task, beset by bureaucracy. However, you can set up a bitcoin address in seconds, no questions asked, and with no fees payable.

3. It’s anonymous

Well, kind of. Users can hold multiple bitcoin addresses, and they aren’t linked to names, addresses, or other personally identifying information. However…

4. It’s completely transparent

…bitcoin stores details of every single transaction that ever happened in the network in a huge version of a general ledger, called the blockchain. The blockchain tells all.

If you have a publicly used bitcoin address, anyone can tell how many bitcoins are stored at that address. They just don’t know that it’s yours.

There are measures that people can take to make their activities more opaque on the bitcoin network, though, such as not using the same bitcoin addresses consistently, and not transferring lots of bitcoin to a single address.

5. Transaction fees are miniscule

Your bank may charge you a £10 fee for international transfers. Bitcoin doesn’t.

6. It’s fast

You can send money anywhere and it will arrive minutes later, as soon as the bitcoin network processes the payment.

7. It’s non-repudiable

When your bitcoins are sent, there’s no getting them back, unless the recipient returns them to you. They’re gone forever.

So, bitcoin has a lot going for it, in theory. But how does it work, in practice? Read more to find out how bitcoins are mined, what happens when a bitcoin transaction occurs, and how the network keeps track of everything.

1.First we’ll purchase the popular cryptocurrency Bitcoin on coinbase.

2.Use this link to sign up to Coinbase we’ll both receive ten dollars of free coins when you spend over $100 (or the equivalent in your currency).

3.Press the ‘sign up’ button and fill out your name (make sure this is exactly how it’s written on your photo ID), email, password and location.

Just like a US bank, Coinbase is regulated by the US government, and has to follow strict financial rules. So they take verifying your identity very seriously. It’s a pain, but it does give Coinbase a reputation for being the most trusted way to convert fiat currency to cryptocurrency.

To verify your account you must supply a phone number, upload an image of your photo ID and verify a credit/debit card or bank account before you can buy.

4.Using a credit/debit card on Coinbase means higher fees but offers instant purchasing. Using a bank transfer is cheaper but slower (taking up to a week to get your coins).

Once your payment details are verified, click ‘buy/sell’ on the top menu.

Select ‘Bitcoin’, and at the bottom of the page choose how much to spend in your local currency / how many coins you want to buy.

Once you’re happy with the amount, click the big ‘Buy’ button.

You’ll be asked to confirm your purchase.

Press the ‘Confirm Buy’ button.

Congratulations! You now own some Bitcoin.